

Synopsis: Typically, regardless of how ready you’re, edge-gluing boards for a tabletop results in sub-par outcomes. This clamping station by Alan McIvor helps make panel glue-ups foolproof. It may be used on extensive, slim, thick, or skinny boards. It’s straightforward to disassemble for storage, and all of the components price lower than $100.
Once I was constructing a kitchen desk not too long ago, I edge-glued half a dozen boards to make the highest. It was unwieldy, so I glued up two subassemblies of three boards every, then glued them collectively. I took all the same old precautions, with cautious edge-jointing, clamps above and beneath the boards, and three pairs of cauls. The outcomes weren’t good. The boards had shifted, the glue had smeared, and I had days
of labor attempting to get the panel flat and clear. In the long run, I assumed: There should be a greater solution to glue up a clear, flat panel! That’s once I designed and made this clamping station for panel glue-ups.
The jig is designed to permit for max flexibility: It may be used for gluing up boards which can be extensive or slim, lengthy or brief, thick or skinny. The clamp holders slide aspect to aspect, so clamps will be positioned both shut collectively for slim boards or farther aside for extensive boards. The clamp holders will also be adjusted up and right down to place the clamp screws precisely on the centerline of the boards, eliminating the necessity to put alternate clamps beneath and above the panel. The jig can deal with boards starting from 1 ⁄ 2 in. to three in. thick.
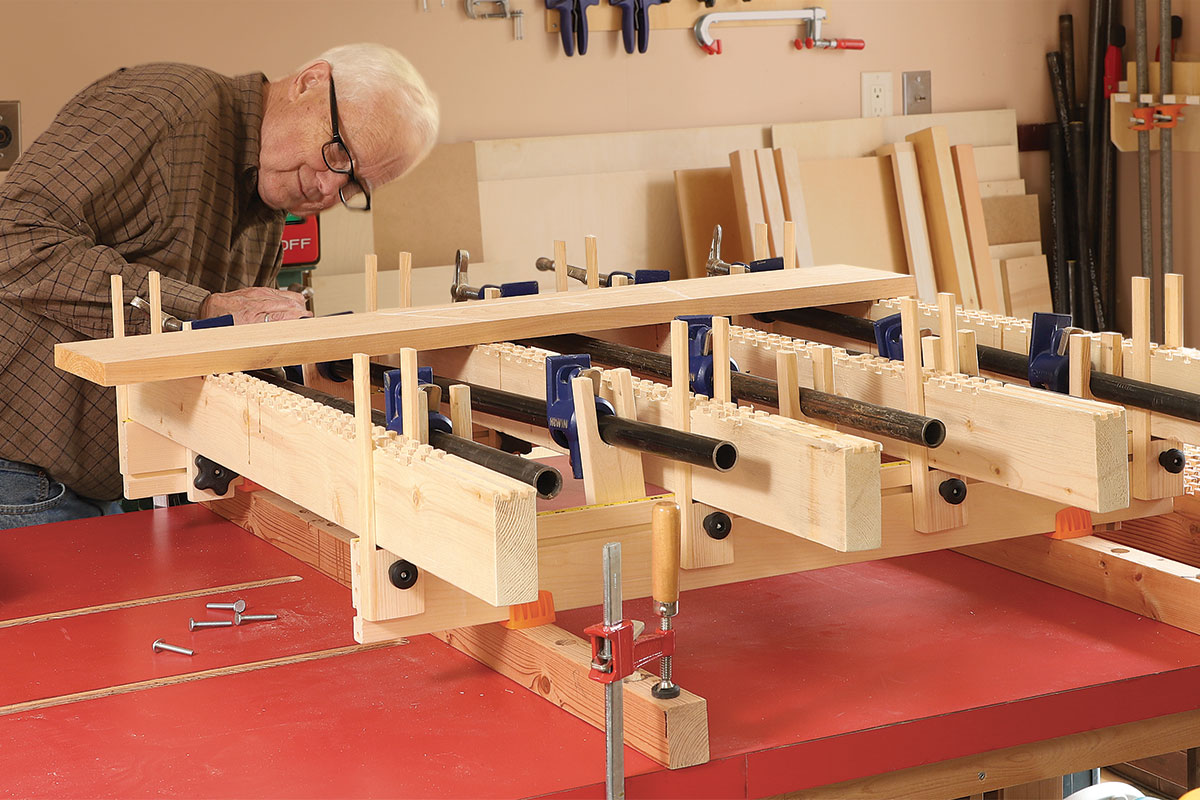
Knock-down panel-clamping jig
Whereas able to clamping massive panels, the jig disassembles simply and shops compactly. Manufactured from softwood, it price lower than $100, together with {hardware}.


The setup will be assembled in about half-hour and disassembled in about quarter-hour. The disassembled components take up little or no cupboard space when not in use; I stack the lengthy rails and match all the opposite components in a field that measures about 1 cubic foot. The usual rails I exploit are 36 in. lengthy; for longer glue-ups I join them end-to-end to a different set of 36-in. rails with dry dowel pins in the long run grain. You possibly can make your commonplace rails any size you assume can be most helpful.
Making the jig parts
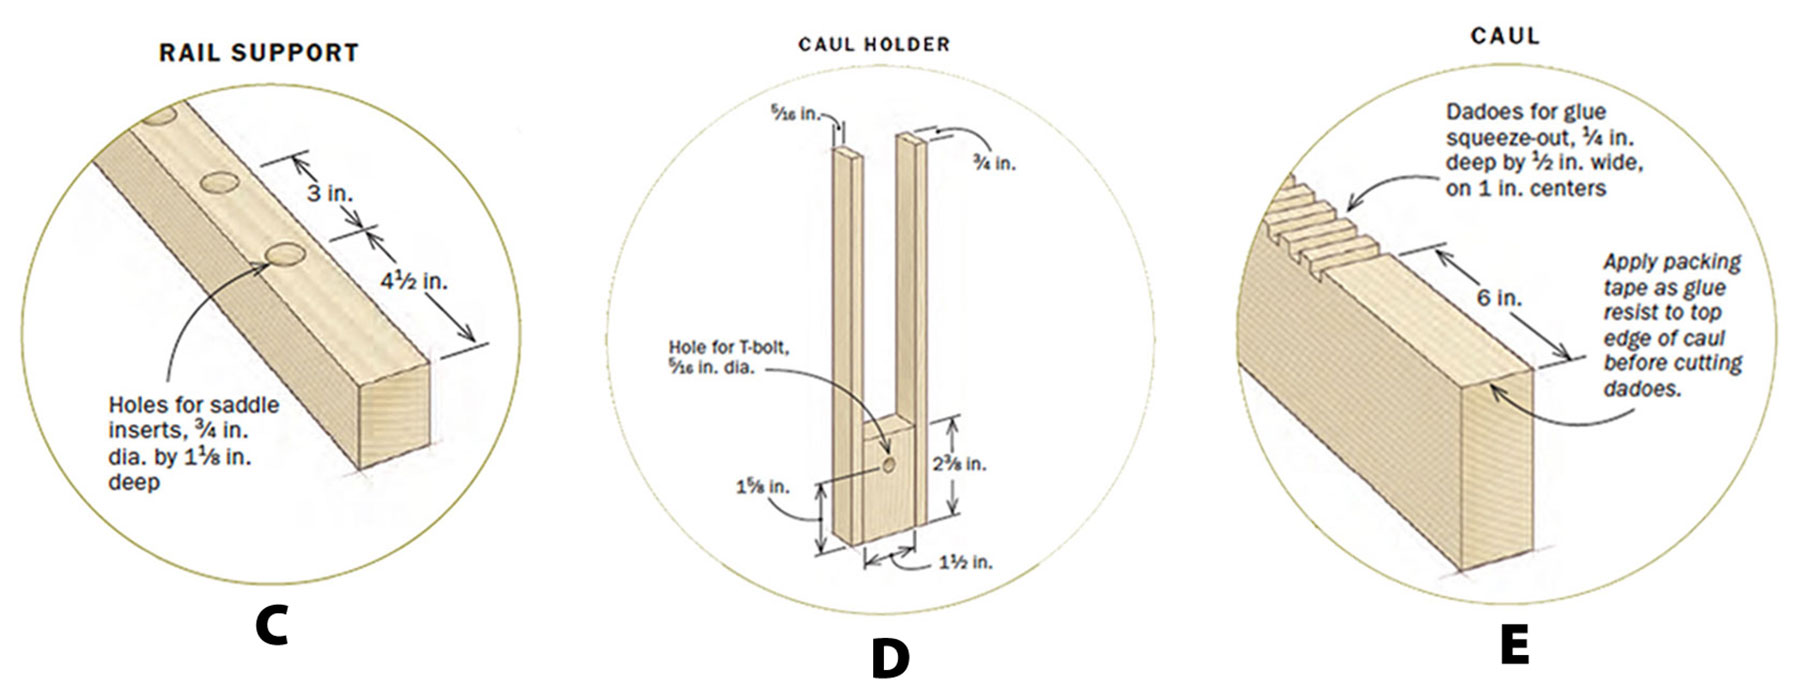
Rail helps
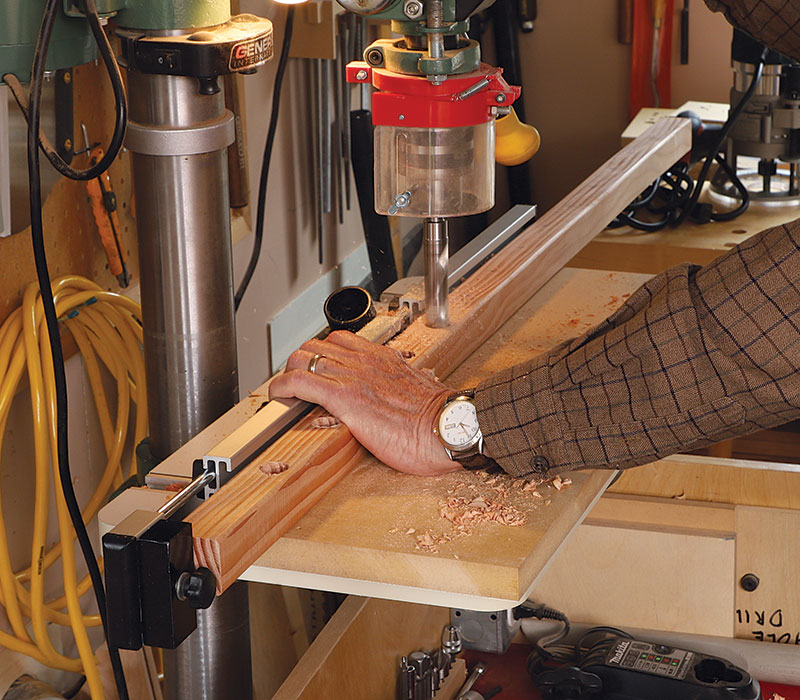
Rails


Clamp holders

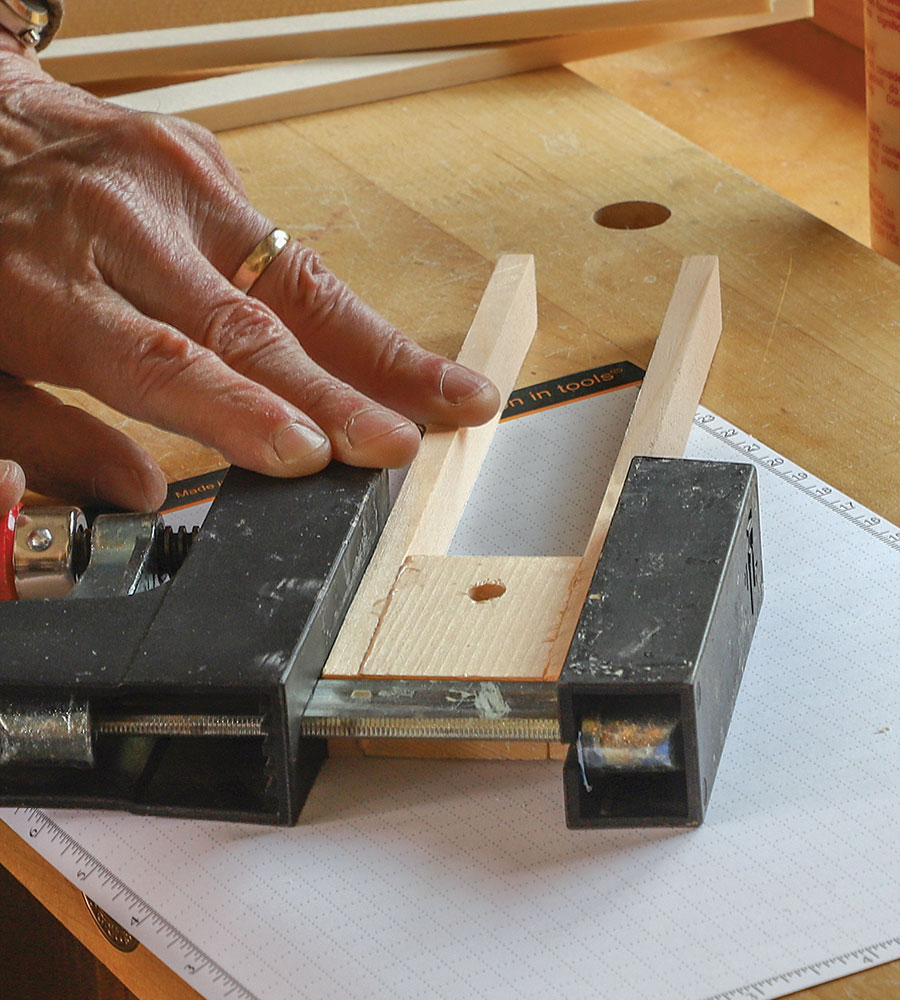
Caul holders
Notched cauls
I made the cauls for my jig 3-3 ⁄ 8 in. extensive to attenuate deflection, so there’s no have to camber them. They’re dadoed on the sting that contacts the panel to attenuate glue smearing. I shift the cauls to find dadoes above and beneath the gluelines. This doesn’t remove the necessity to wax the cauls or add packing tape, nevertheless it does permit for simpler cleanup.
I made the jig with construction- grade softwoods. That’s nice, however I like to recommend making the rails out of maple for clean, long-wearing T-slots. The Tbolts and clamping knobs can be found from most woodworking gear suppliers, and the price of all of the parts (excluding the clamps) was lower than $100. The design is predicated on the usage of pipe clamps, however the clamp holders could possibly be modified for bar clamps as an alternative.
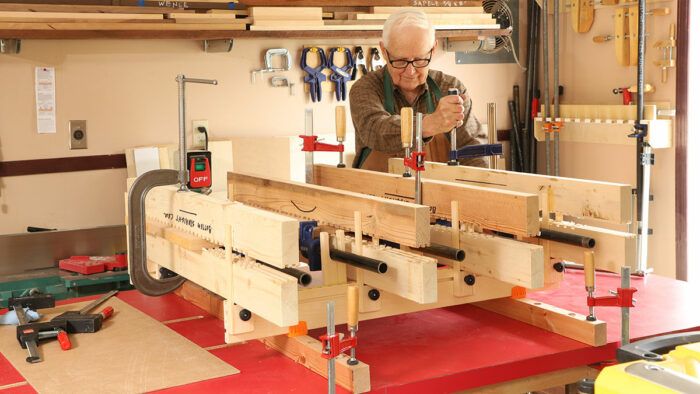
Assemble the jig and get gluing
To arrange the jig, lay out the rail helps about 24 in. aside on a flat and degree desk or benchtop and clamp them in place. These helps could possibly be clamped to a pair of sawhorses as an alternative; if they’re, they need to be shimmed so all 4 corners are degree. Additionally, for those who plan to make use of the jig on sawhorses, I might make the rail helps a bit stouter to attenuate deflection.
Organising the jig


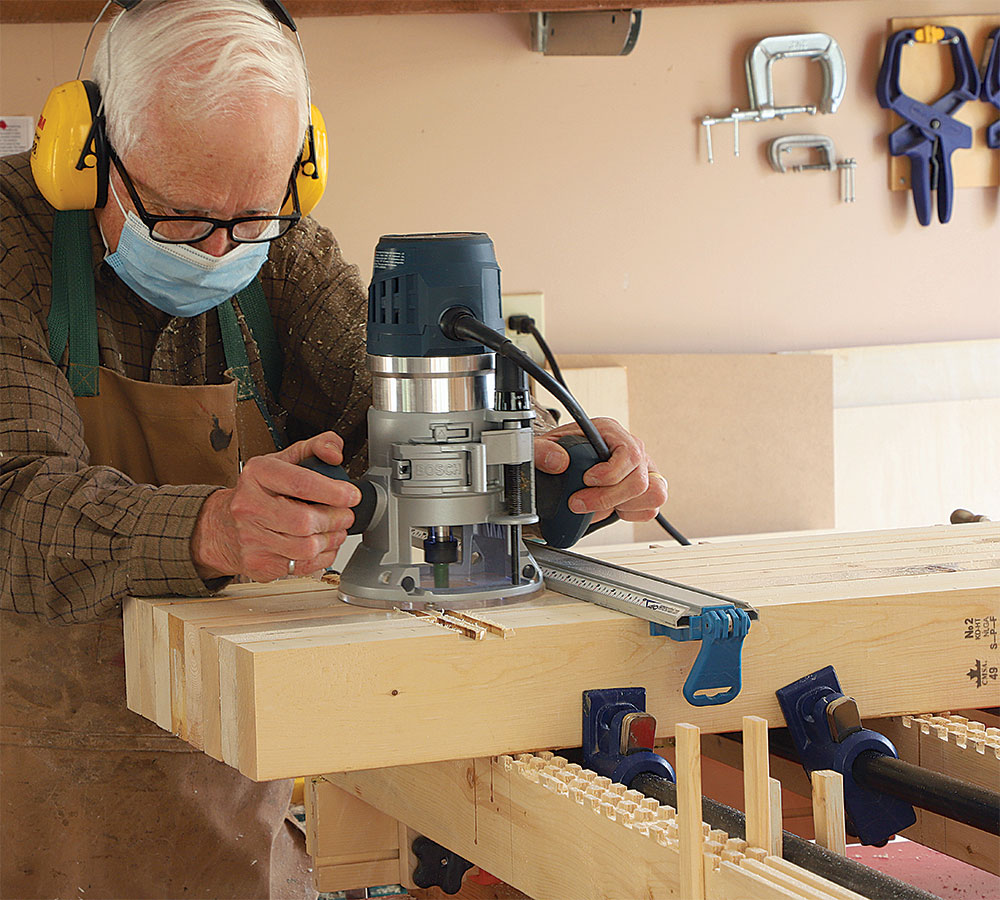
Subsequent, insert plastic saddles into the holes within the rail helps, and set the rails within the saddles. Slide Tbolts into the grooves within the rails and fix the pipe-clamp holders and the caul holders with their respective clamping knobs. I place caul holders at every finish of the panel boards I’ll be gluing and put clamp holders near them. I area different clamp holders between them so the clamps might be on roughly 6-in. or 8-in. facilities.
Place the underside cauls of their holders and regulate the holders so the cauls are sq. to the rails. Insert pipe clamps into their holders and shift the holders aspect to aspect, if want be, so the pipes are sq. to the rails and equally spaced.
Lay one of many boards you’ll be gluing onto the underside cauls and lift or decrease the entrance pipe-clamp holders so the clamp screw strains up with the middle of the board’s thickness. Modify the rear clamp holders too, so the pipes are degree entrance to again. Then clamp the holders tight to the rails.
Gluing a panel


After placing the remainder of the boards to be glued onto the jig, slide the underside cauls fore and aft so their dadoes are positioned underneath the sting joints of the glue-up. Relying on the widths of the panel boards, it might not be doable to align the entire gluelines; simply align as many as you possibly can. Lastly, set the highest cauls throughout the panel boards and make certain there’s ample area to insert the caul clamps.
Now, if all appears to be like good, you’re able to roll on the glue and apply some mild, uniform strain with the pipe clamps, beginning on the heart. Calmly tighten the F-clamps on the cauls, once more working from the middle to the ends of the panel. Test for panel flatness underneath the top cauls, after which tighten the pipe clamps all the best way, once more working from the middle out to the ends.
Alan McIvor is a retired pulp and paper engineer and an avid woodworker in Vancouver, B.C., Canada.

Images: Jonathan Binzen.
Drawings: Dan Thornton.
From Positive Woodworking #300
Obtain FREE PDF


0 Comments